First steps with tilesets
Get your tileset set up for editing.
Table of contents
Creating a tileset
To create a tileset in Worldsmith, you’ll need to:
- Open Worldsmith through Steam.
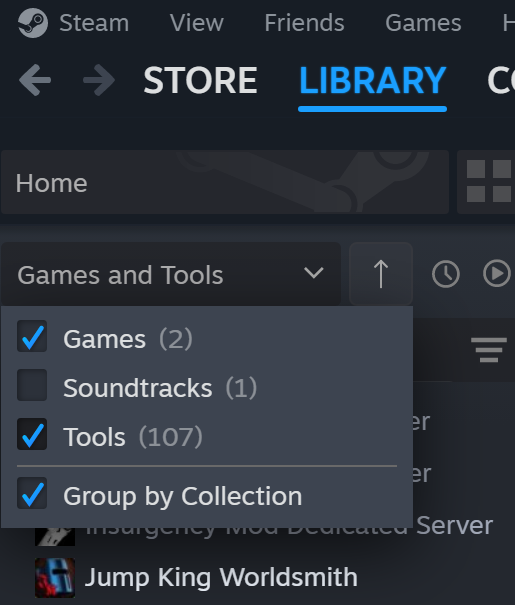
If you do not find it in your library, head over in your Steam library, then on top-left you can find a dropdown and a search box.
Either try searching for “Jump King Worldsmith” in the search box, or by clicking the dropdown, select “Tools” and Worldsmith will now appear in your sidelist like shown.

Once opened, make sure you are in the home page of Worldsmith, this is what the page should roughly look like:
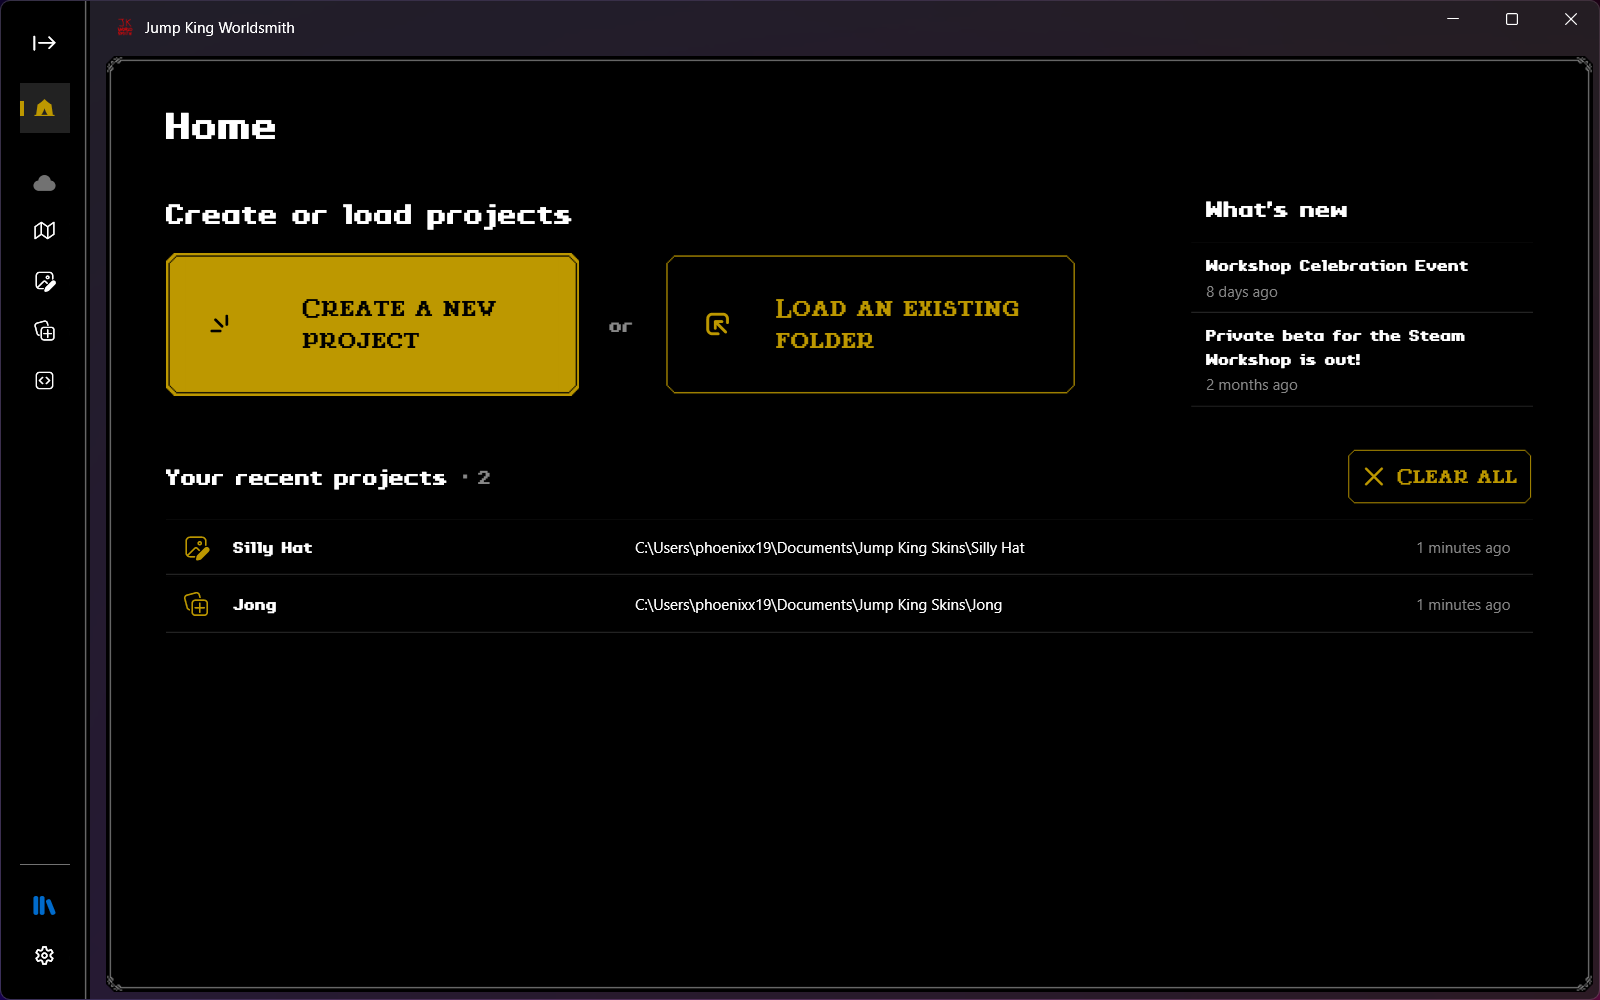
- Click on Create a new project.
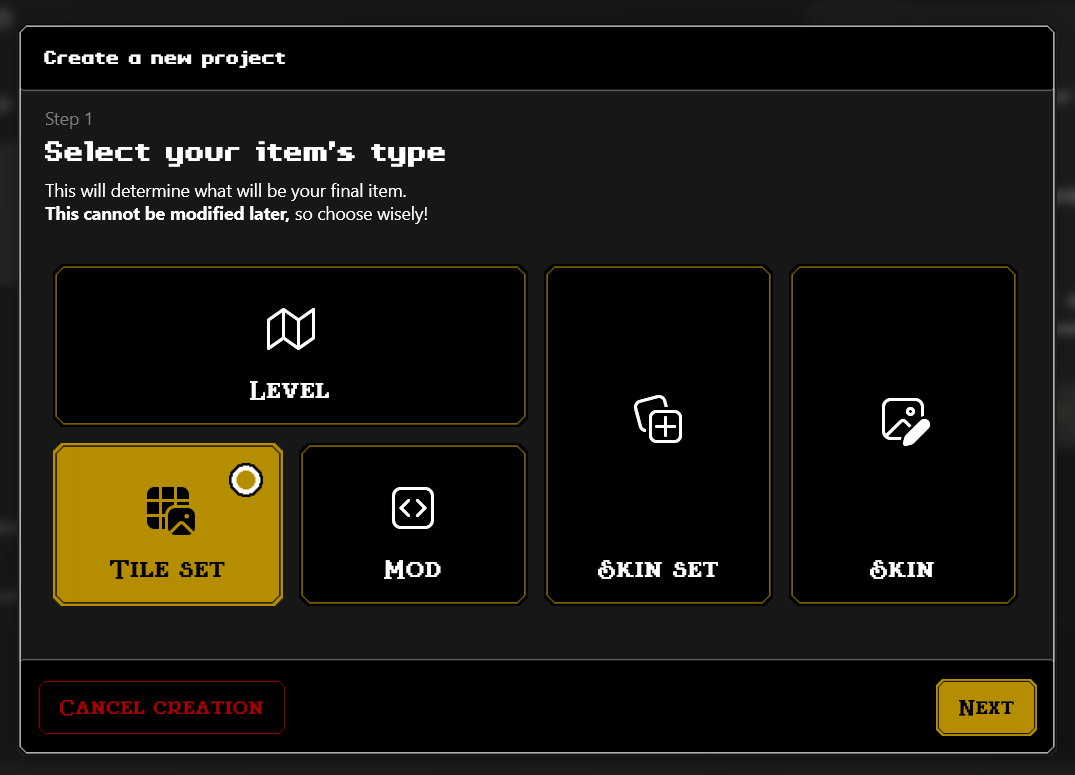
Worldsmith will ask you which item you’d want to create, select Tileset.
- Once clicked Next, Worldsmith will ask you what you want to call your tileset (you can change this later) and where do you want to place it in your computer. Under Name, click on the input box and write the name of your tileset; and under Folder, click on the folder icon to select which folder to use for your item.
Make sure you create a new folder for your tileset or make sure the folder is empty before continuing! Worldsmith is currently in development and this is a temporary solution.
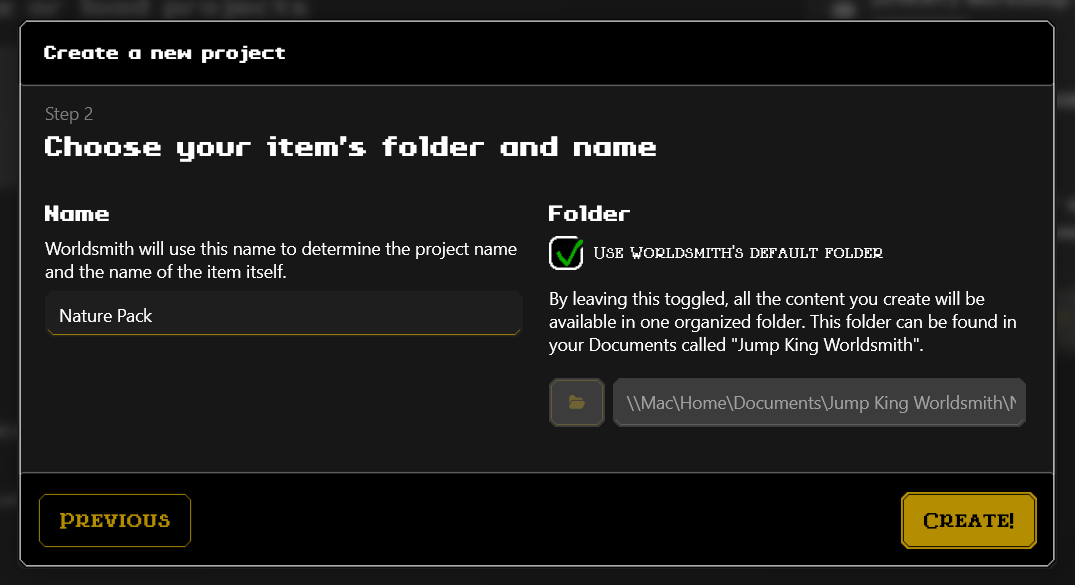
- Click Create!, once clicked it Worldsmith will create the base for new tileset.
And that’s it! You’ve successfully created your first tileset for Worldsmith.
Next up
Go to tileset making to learn how to modify further your tileset.