Tileset Making
everything you need to know to make a tileset.
Table of contents
Introduction
Tilesets follow the ratio hitbox-to-screen which is 1 to 8; meaning one pixel in hitboxes equals to 8 pixels in screen detail (background, midground or foreground), therefore each tile consists of 8 by 8 pixels. Reference to hitboxes ratio.
Editing the tileset texture
To edit the tileset texture:
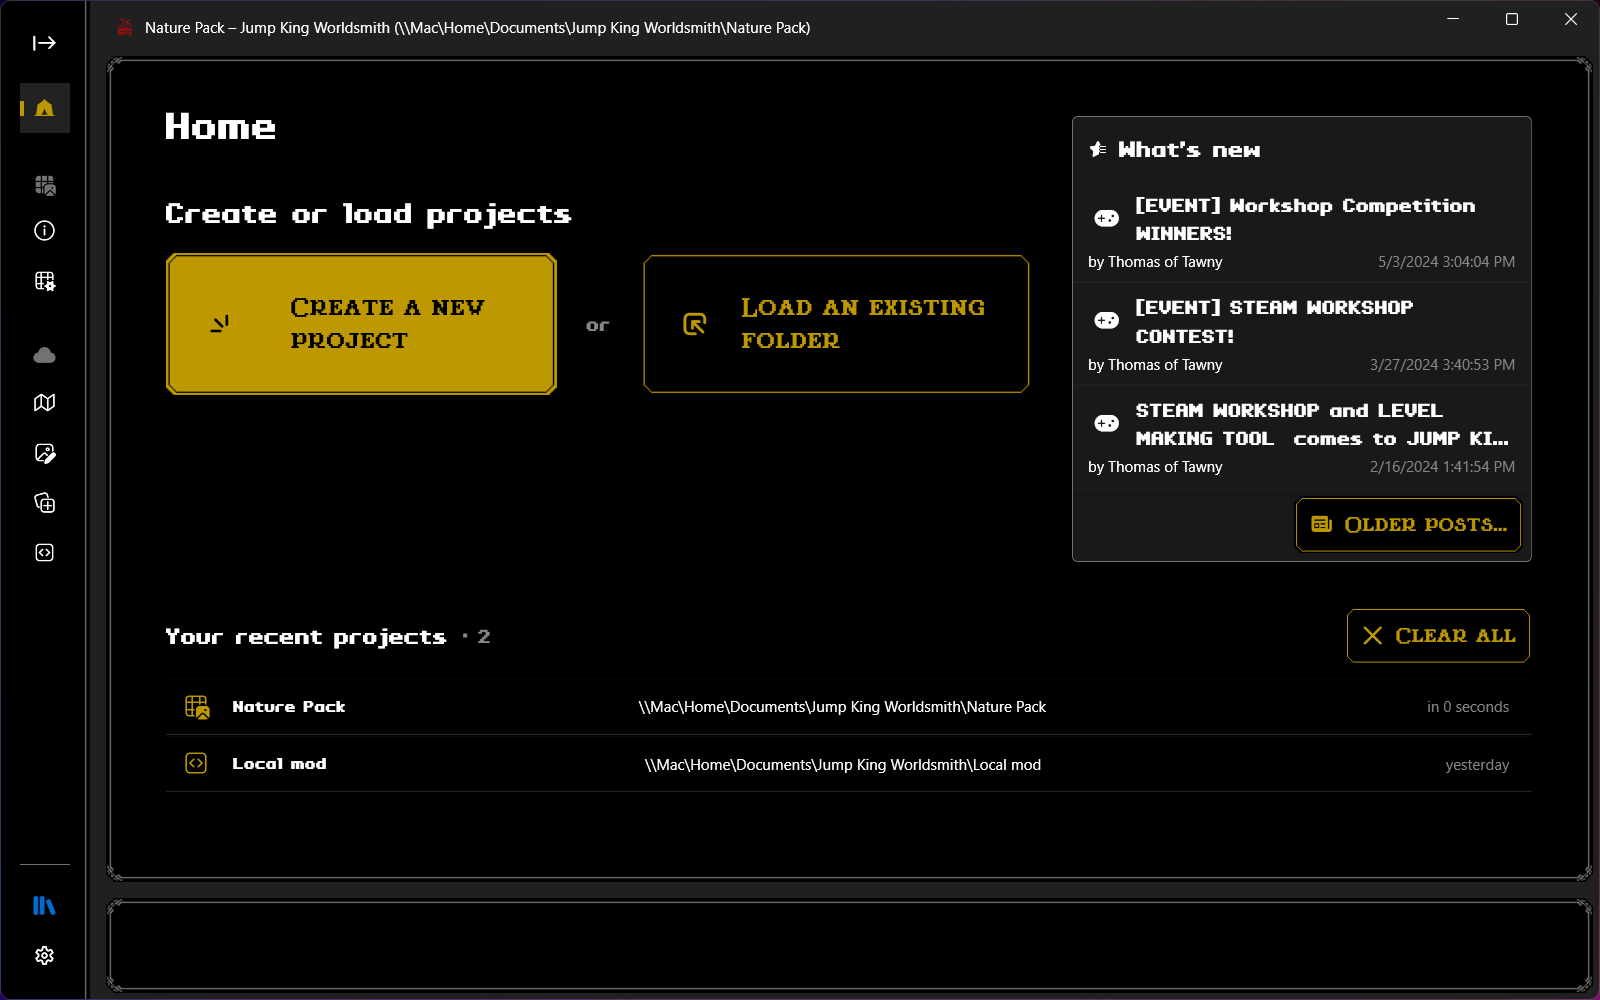
Open Worldsmith through Steam and open your tileset project from the recents or favorites list.
If you can’t find your project in your recents/favorites list and you know where it’s placed in your drive, click on Load an existing project and follow the instructions on screen.
Once clicked, you’ll see the title of your tileset in the header of Worldsmith, this means your project has been opened in Worldsmith. Some pages will show up on the sidebar now like in the image below.
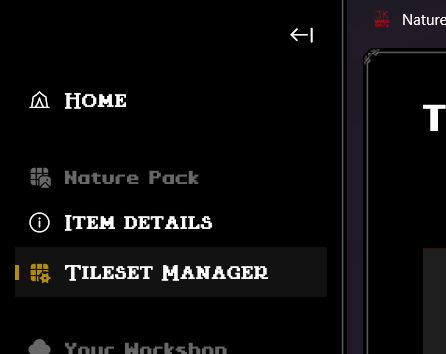
From the left sidebar, enlarge the sidebar with the expand button and click on Tileset Manager or click on the second item below the tileset icon (resembling a table with a cog).
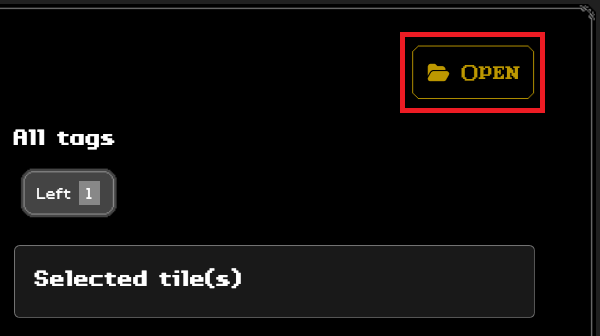
Click on the “Open” button with a folder icon on top-right.
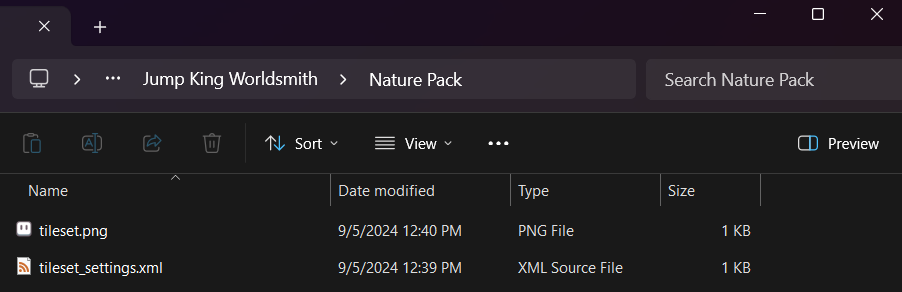
This will open your file explorer selecting the tileset. Here you can right-click the tileset > Open with and select your pixelart or photo-editing program of preference.
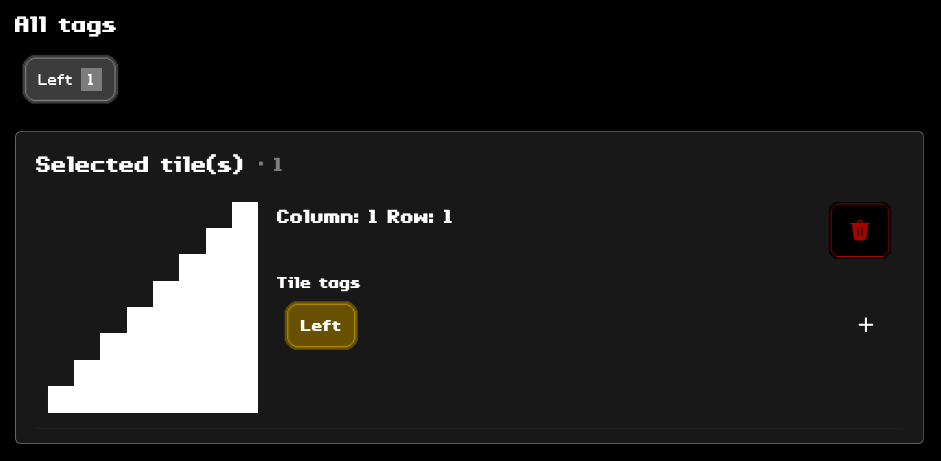
Tile tags
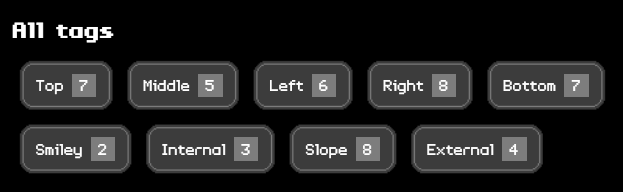
A tileset can have as many tiles as necessary, so it makes sense to have a filter between the tiles of one or multiple tilesets.
The tile tags are tied to the column and row of a certain tile.
Moving the tile settings to a new tile is currently not implemented, so you will need to delete and write the tags again if you move your tiles.
Nomenclature for tile tags
Since anyone can create tile tags, its easy to have different tags that group the same category; so here as follows there are some guidelines you can use to share the best experience between you and the people that have subscribed to your tileset.
Use English as the language for your tags.
Not everyone will understand your language, but most people will understand English.Make sure the item tag is not ambiguous. So future you and other people can easily understand it.
Instead of using something likeDetailas a tag, which is generic and doesn’t tell at first glance, specify it a bit better likeFoliage.Capitalize the first word only, even if you have a tag that contains multiple words.
UseKitchen applianceinstead ofKitchen Appliance,kitchen applianceorKITCHEN APPLIANCE.Use multiple tags, if your tag count is growing big.
For example, if you have 14 tiles in your categoryNature, might be a good to have a subcategoryTreeandFlower. Or viceversa, with another supercategory.
Here’s an example that follows the guidelines above:
Adding a tile tag
To add a tag on a tile:
Click on the tile you are looking to add the tag on.
Double click if the tile has not yet created.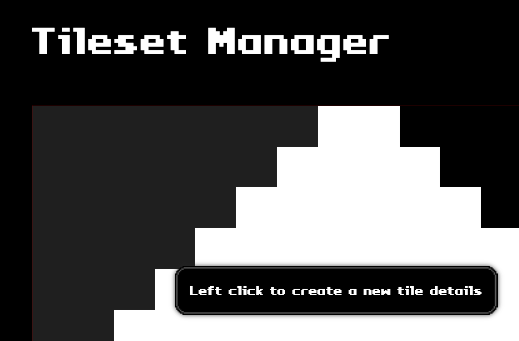
Both on the sidebar and on the tile preview, you should see which tile is selected. Use your mouse or cursor to reselect the tile if it isn’t the right one.
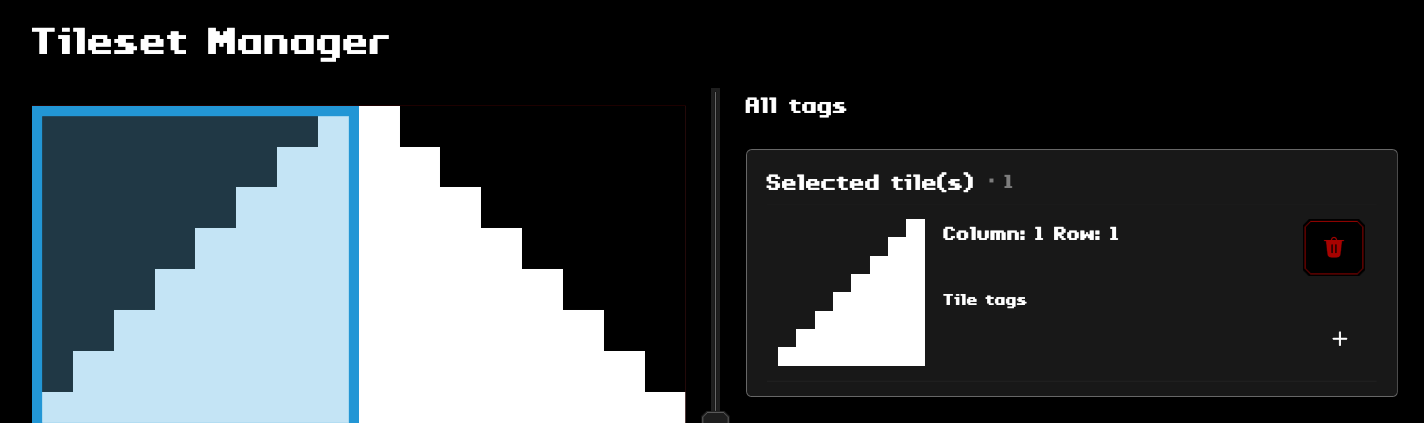
Once selected the right tile, click on the “+” button on the bottom right corner of the tile in the sidebar.
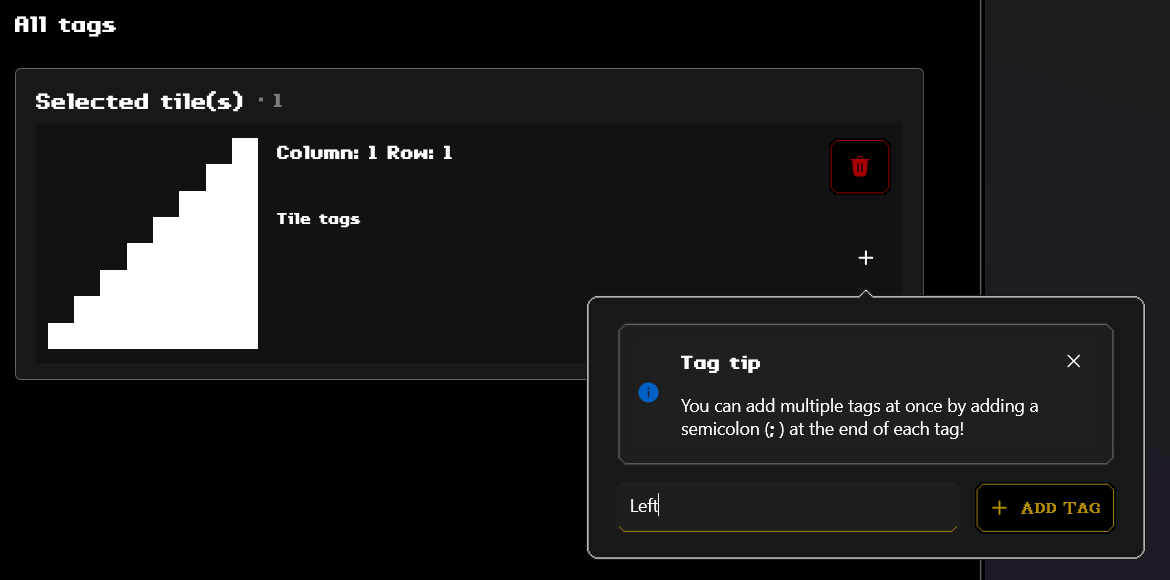
A popup will prompt you to type the tag type. Simply type the tag and click “Add Tag” once done.
You have successfully added a tag on your tile!
Removing a tile tag
To remove a tag on a tile:
- Click on the tile you are looking to remove the tag from.
- Click on the tag to remove it.
Done! You have removed a tag from a tile.
Next up
Once you are done with your tileset, read Publishing.