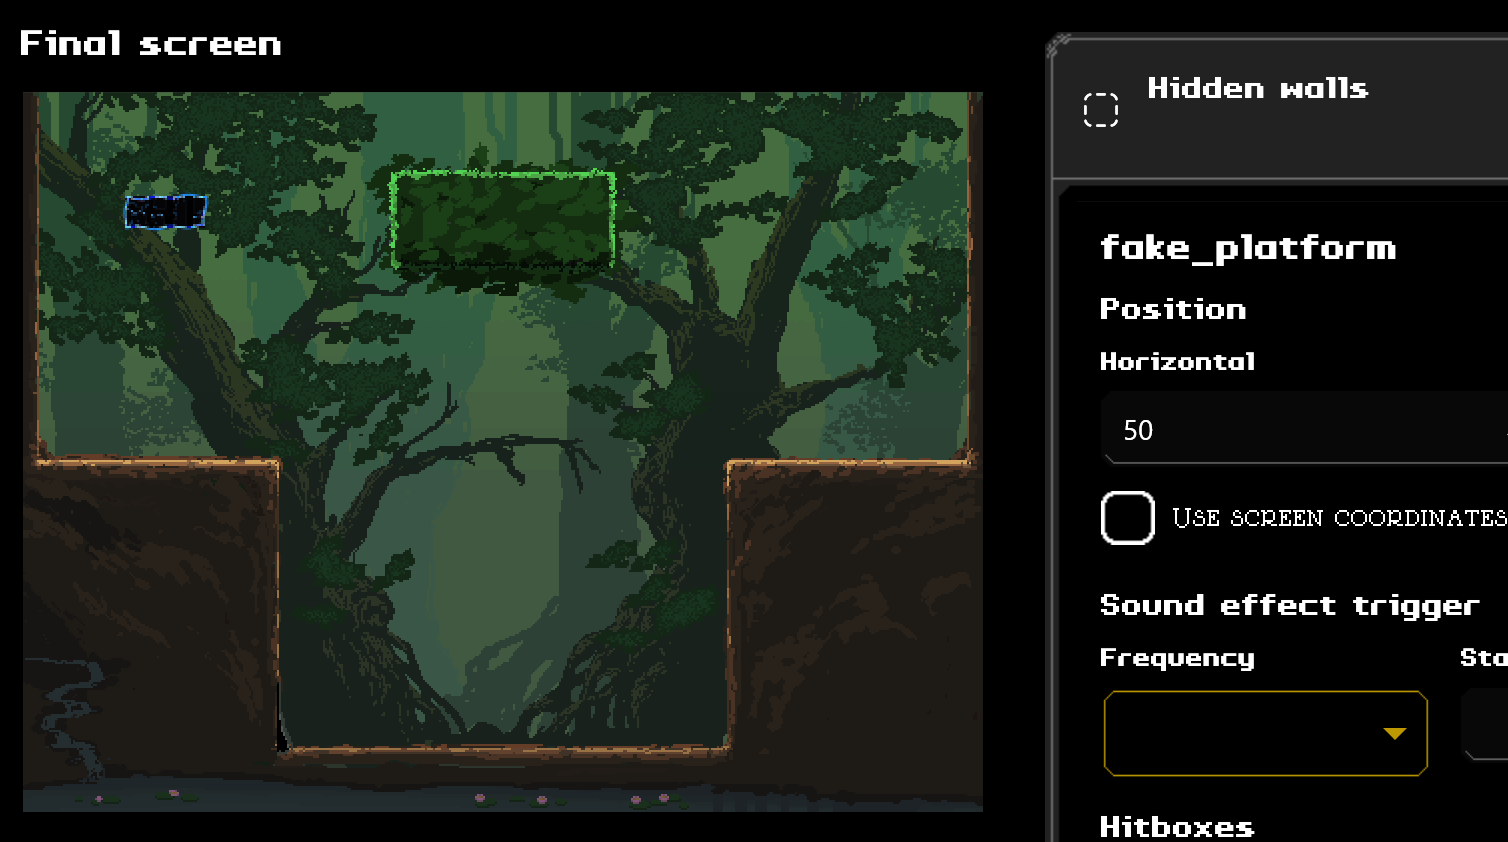
Hidden walls are graphics placed in front of other layers to hide them. They become transparent when the player touches them.
Before colliding the hidden wall
After colliding the hidden wall
Dealing with hidden walls
Adding a hidden wall
Navigate to the Screens page.
Using the Go to screen… button or the up-down arrows, move to the screen you want to add a weather.
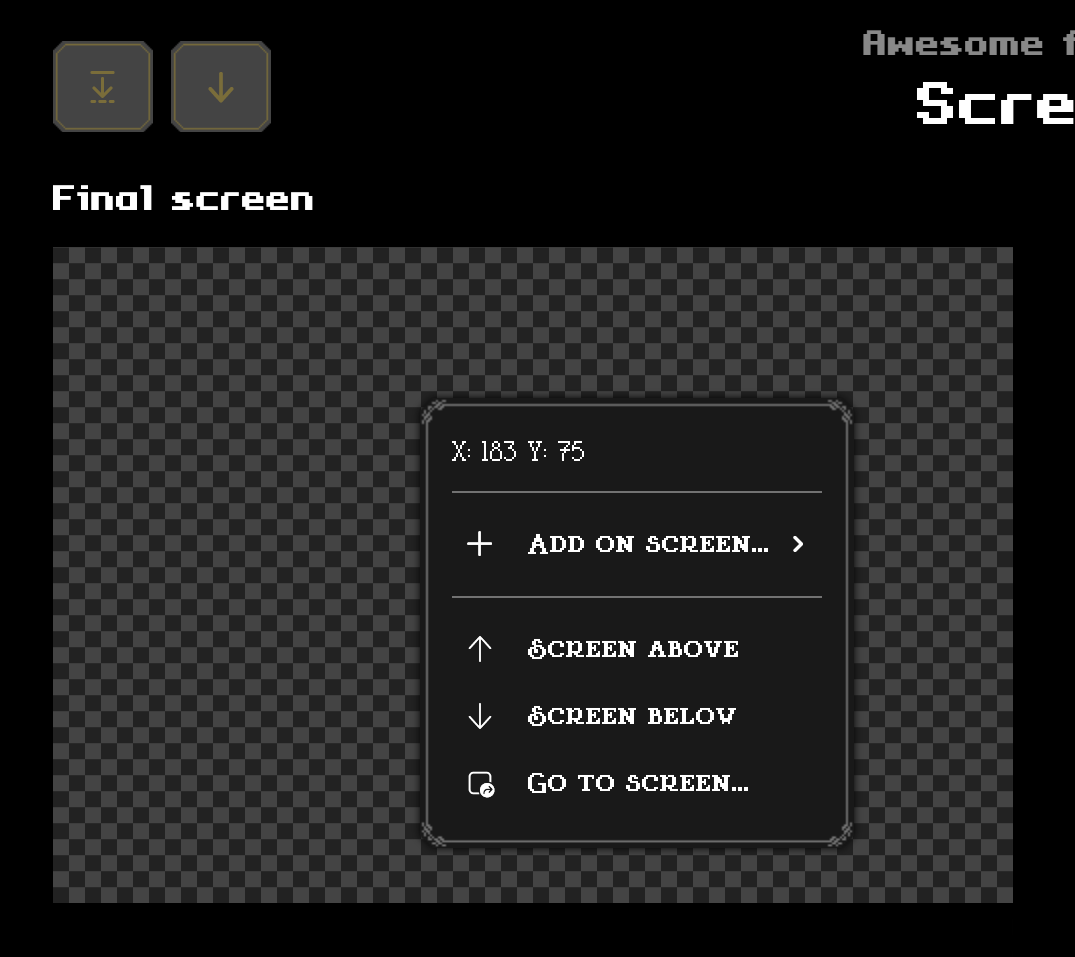
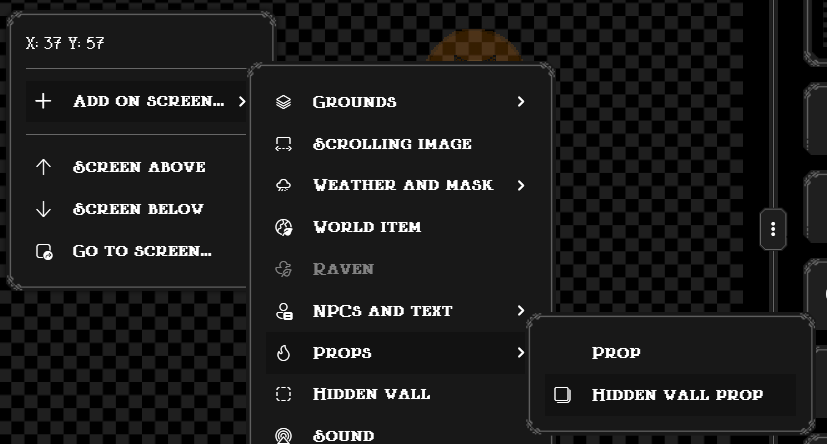
Right-click on the preview on the left-side of the page, a context menu like the following should appear.
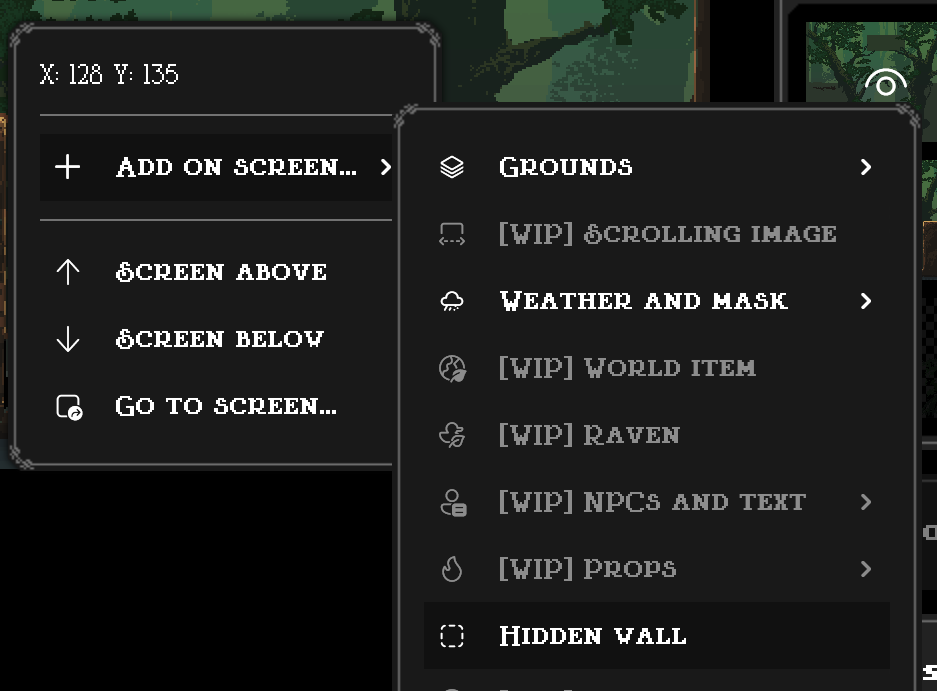
Navigate into Add on screen… and click on Hidden wall.
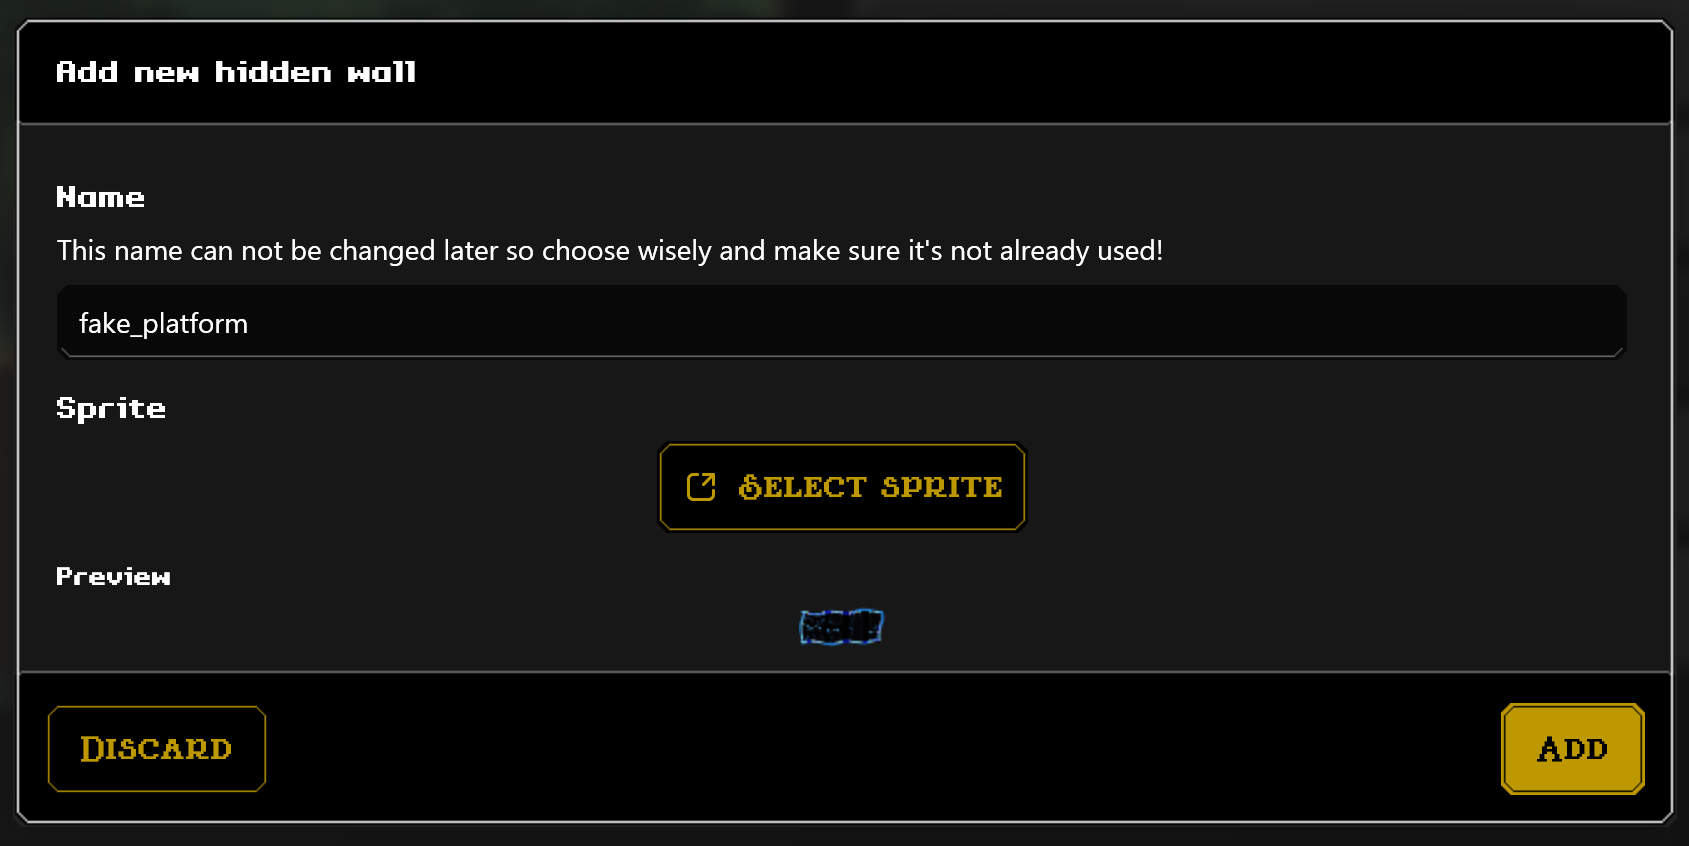
A new prompt will show up asking you some details about your new hidden wall. Write a recognizable name for you, and click Select sprite.
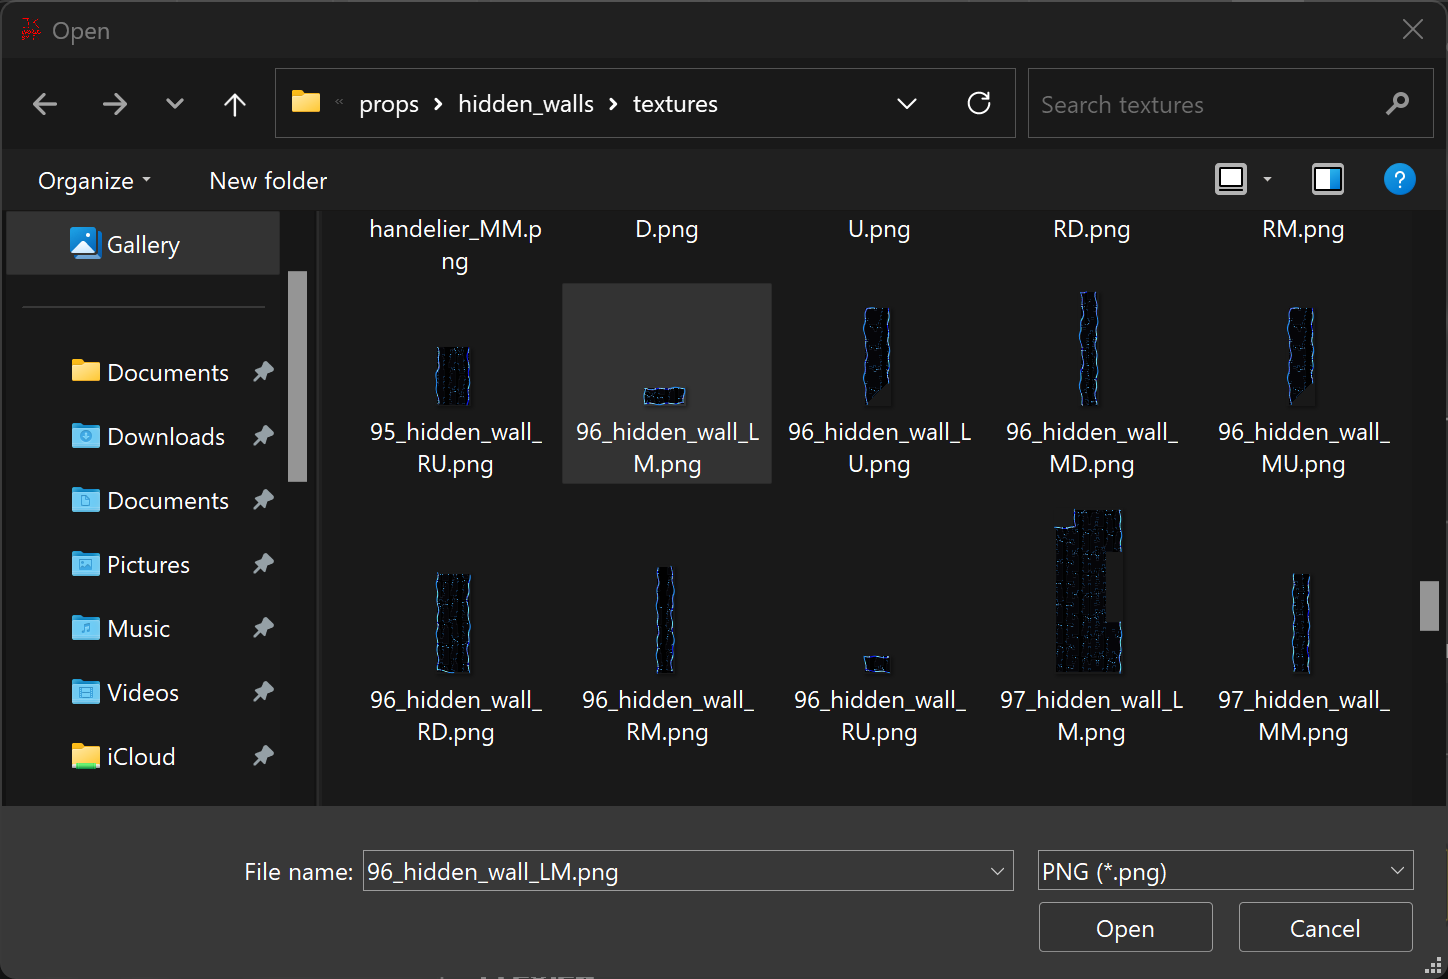
A new prompt will show up asking to you select a sprite for your hidden wall.
After selecting Open, click Add and your hidden wall should be present in your preview!
Changing or removing a hidden wall
Using the Go to screen… button or the up-down arrows, move to the screen you have the weather you want to change/get rid of.
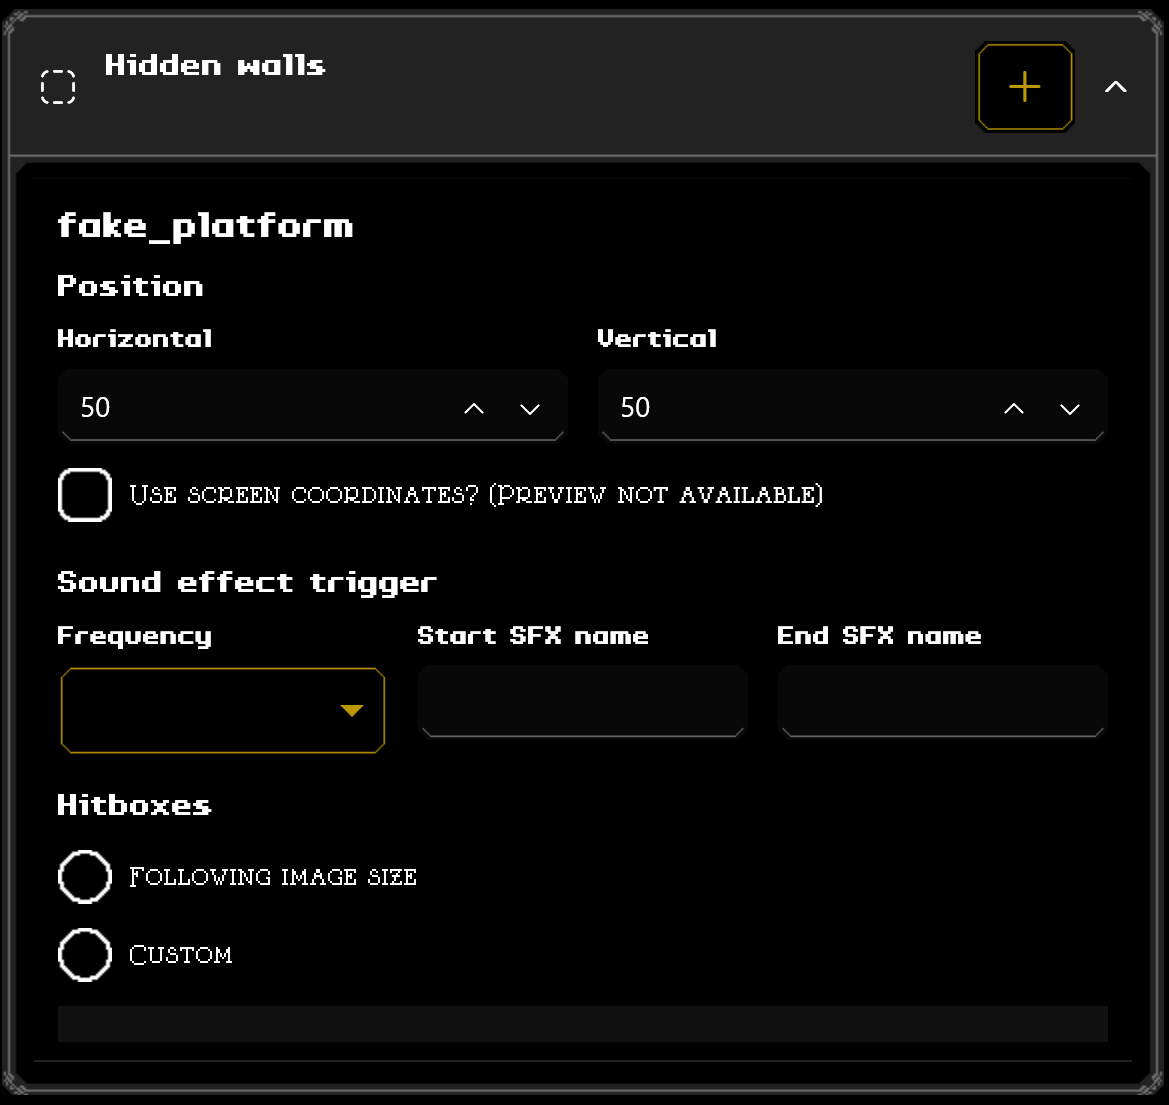
From the right side of the page, expand the Hidden walls tab.
Change the hidden wall position, SFX trigger and hitboxes as you wish.
This might be unstable/working being that it has not been yet completed.
Steps (without Worldsmith)
Adding a hidden wall
If you want to add a new hidden wall:
Convert an image file into a packed XNB file.
While there aren’t any restrictions with how it should be named, avoid using spaces or special characters and it’s suggested that you name it in a way that you can retroactively know which file is later on. An example could be:
`SCREEN`_[NAME]_[NUMBER] (e.g. 65_house_1)
If you follow such, you can easily tell which screen the hidden wall is used in, what is the hidden wall, and a number if you have more than one hidden walls.
Head to the following folder: props/hidden_walls.
You can put your new packed hidden wall image inside the textures folder. Write down your hidden wall image file name somewhere, this will be used later.
Check if you already have an existing xml file for the screen that you want to add your new hidden wall image, you can easily find it by searching “hidden_wall” and then the screen number (e.g. hidden_wall65.xml).
If the file doesn’t exists, don’t worry!
Copy the following snippet:
<?xml version="1.0"?><RaymanCollectionxmlns:xsi="http://www.w3.org/2001/XMLSchema-instance"xmlns:xsd="http://www.w3.org/2001/XMLSchema"><walls><RaymanData><achievements><!-- leave this as is --><AchievementCode>GO_THOUGH_ILLUSORY_WALL</AchievementCode><!-- leave this as is --></achievements><!-- leave this as is --><texture_name>YOUR_HIDDEN_WALL_NAME</texture_name><Position><X>YOUR_HIDDEN_WALL_X_POSITION</X><Y>YOUR_HIDDEN_WALL_Y_POSITION</Y></Position></RaymanData></walls></RaymanCollection>
Create a new xml file called hidden_wall[SCREEN] (e.g. hidden_wall65.xml), open it and paste the snippet above
If the file already exists:
Copy the following snippet:
<RaymanData><achievements><!-- leave this as is --><AchievementCode>GO_THOUGH_ILLUSORY_WALL</AchievementCode><!-- leave this as is --></achievements><!-- leave this as is --><texture_name>YOUR_HIDDEN_WALL_NAME</texture_name><Position><X>YOUR_HIDDEN_WALL_X_POSITION</X><Y>YOUR_HIDDEN_WALL_Y_POSITION</Y></Position></RaymanData>
Inside the walls tag, below already existing RaymanDatas, paste your snippet.
Replace YOUR_HIDDEN_WALL_NAME with the filename of your new packed hidden wall.
Replace the X and Y (YOUR_HIDDEN_WALL_X_POSITION and YOUR_HIDDEN_WALL_Y_POSITION) with the relative position of the top-left corner.
Replacing a hidden wall
To replace an already existing hidden wall image:
Convert the new hidden wall image into a packed XNB file.
Replace the old file with the new file in the props/hidden_walls/textures.
If your packed file isn’t named the same as before, you will need to change the texture_name tag in the xml file(s) that previously had the old file or remove the layer completely.
Removing a hidden wall
To remove a hidden wall image:
Find the hidden wall packed image of your choice and remove it.
You will need to remove each RaymanData tag in the xml file(s) that contained your old file as texture_name.
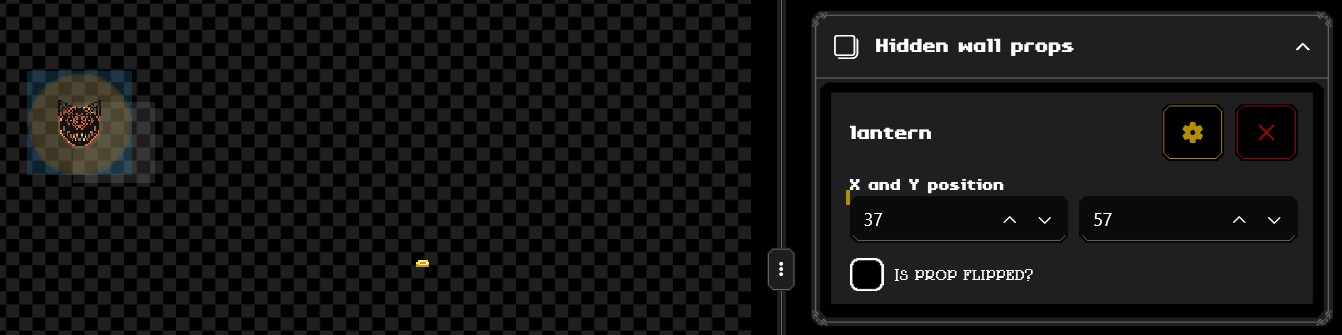
Right-click onto the canvas on the left side of your screen (where you have your level preview) and select Add on screen…, then Props, then Hidden wall prop.
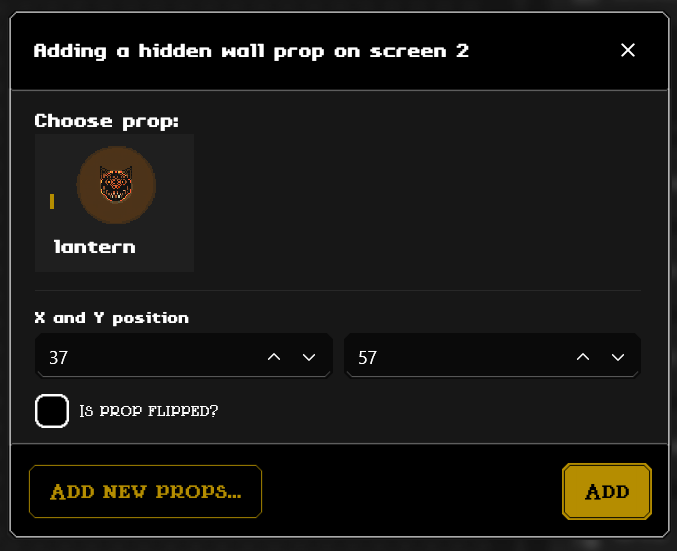
Once clicked, a prompt will ask you a few details. You will need to select which prop you want to add, choose its position and if you want to prop to be horizontally flipped.
Once done setting it up, click Add. Your hidden prop should appear on your preview.