A prop is a (sometimes dynamic) object. It can be any of the following examples:
the bonfire at the start of your journey,
the Old Man,
the hidden cap in the sewer,
the hidden wall covering the cap in the sewer,
the bird with the gold coin,
the gold coin,
the merchant in Bargainburg,
et cetera…
All of these are props, the following subcategories cover each different type of prop.
Good practice with props
Avoid:
using props in the final screen to prevent slight visual bugs from the game after beating the level.
creating big sprite sheets, the game tends to crash if either the image width or height is over 4000 pixels, if you need to have big sprite sheets try to make a square-looking sprite sheet to lower the chances of crashing. (thanks to Abaddon for the tip!)
Simple prop
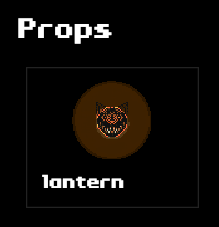
The props in-game (such as the bonfire in the first screen) are stored in the props/textures folder. Inside this folder, there’s a configuration file named prop_settings.xml which contains a list of <PropSetting> tags.
Adding a new simple prop
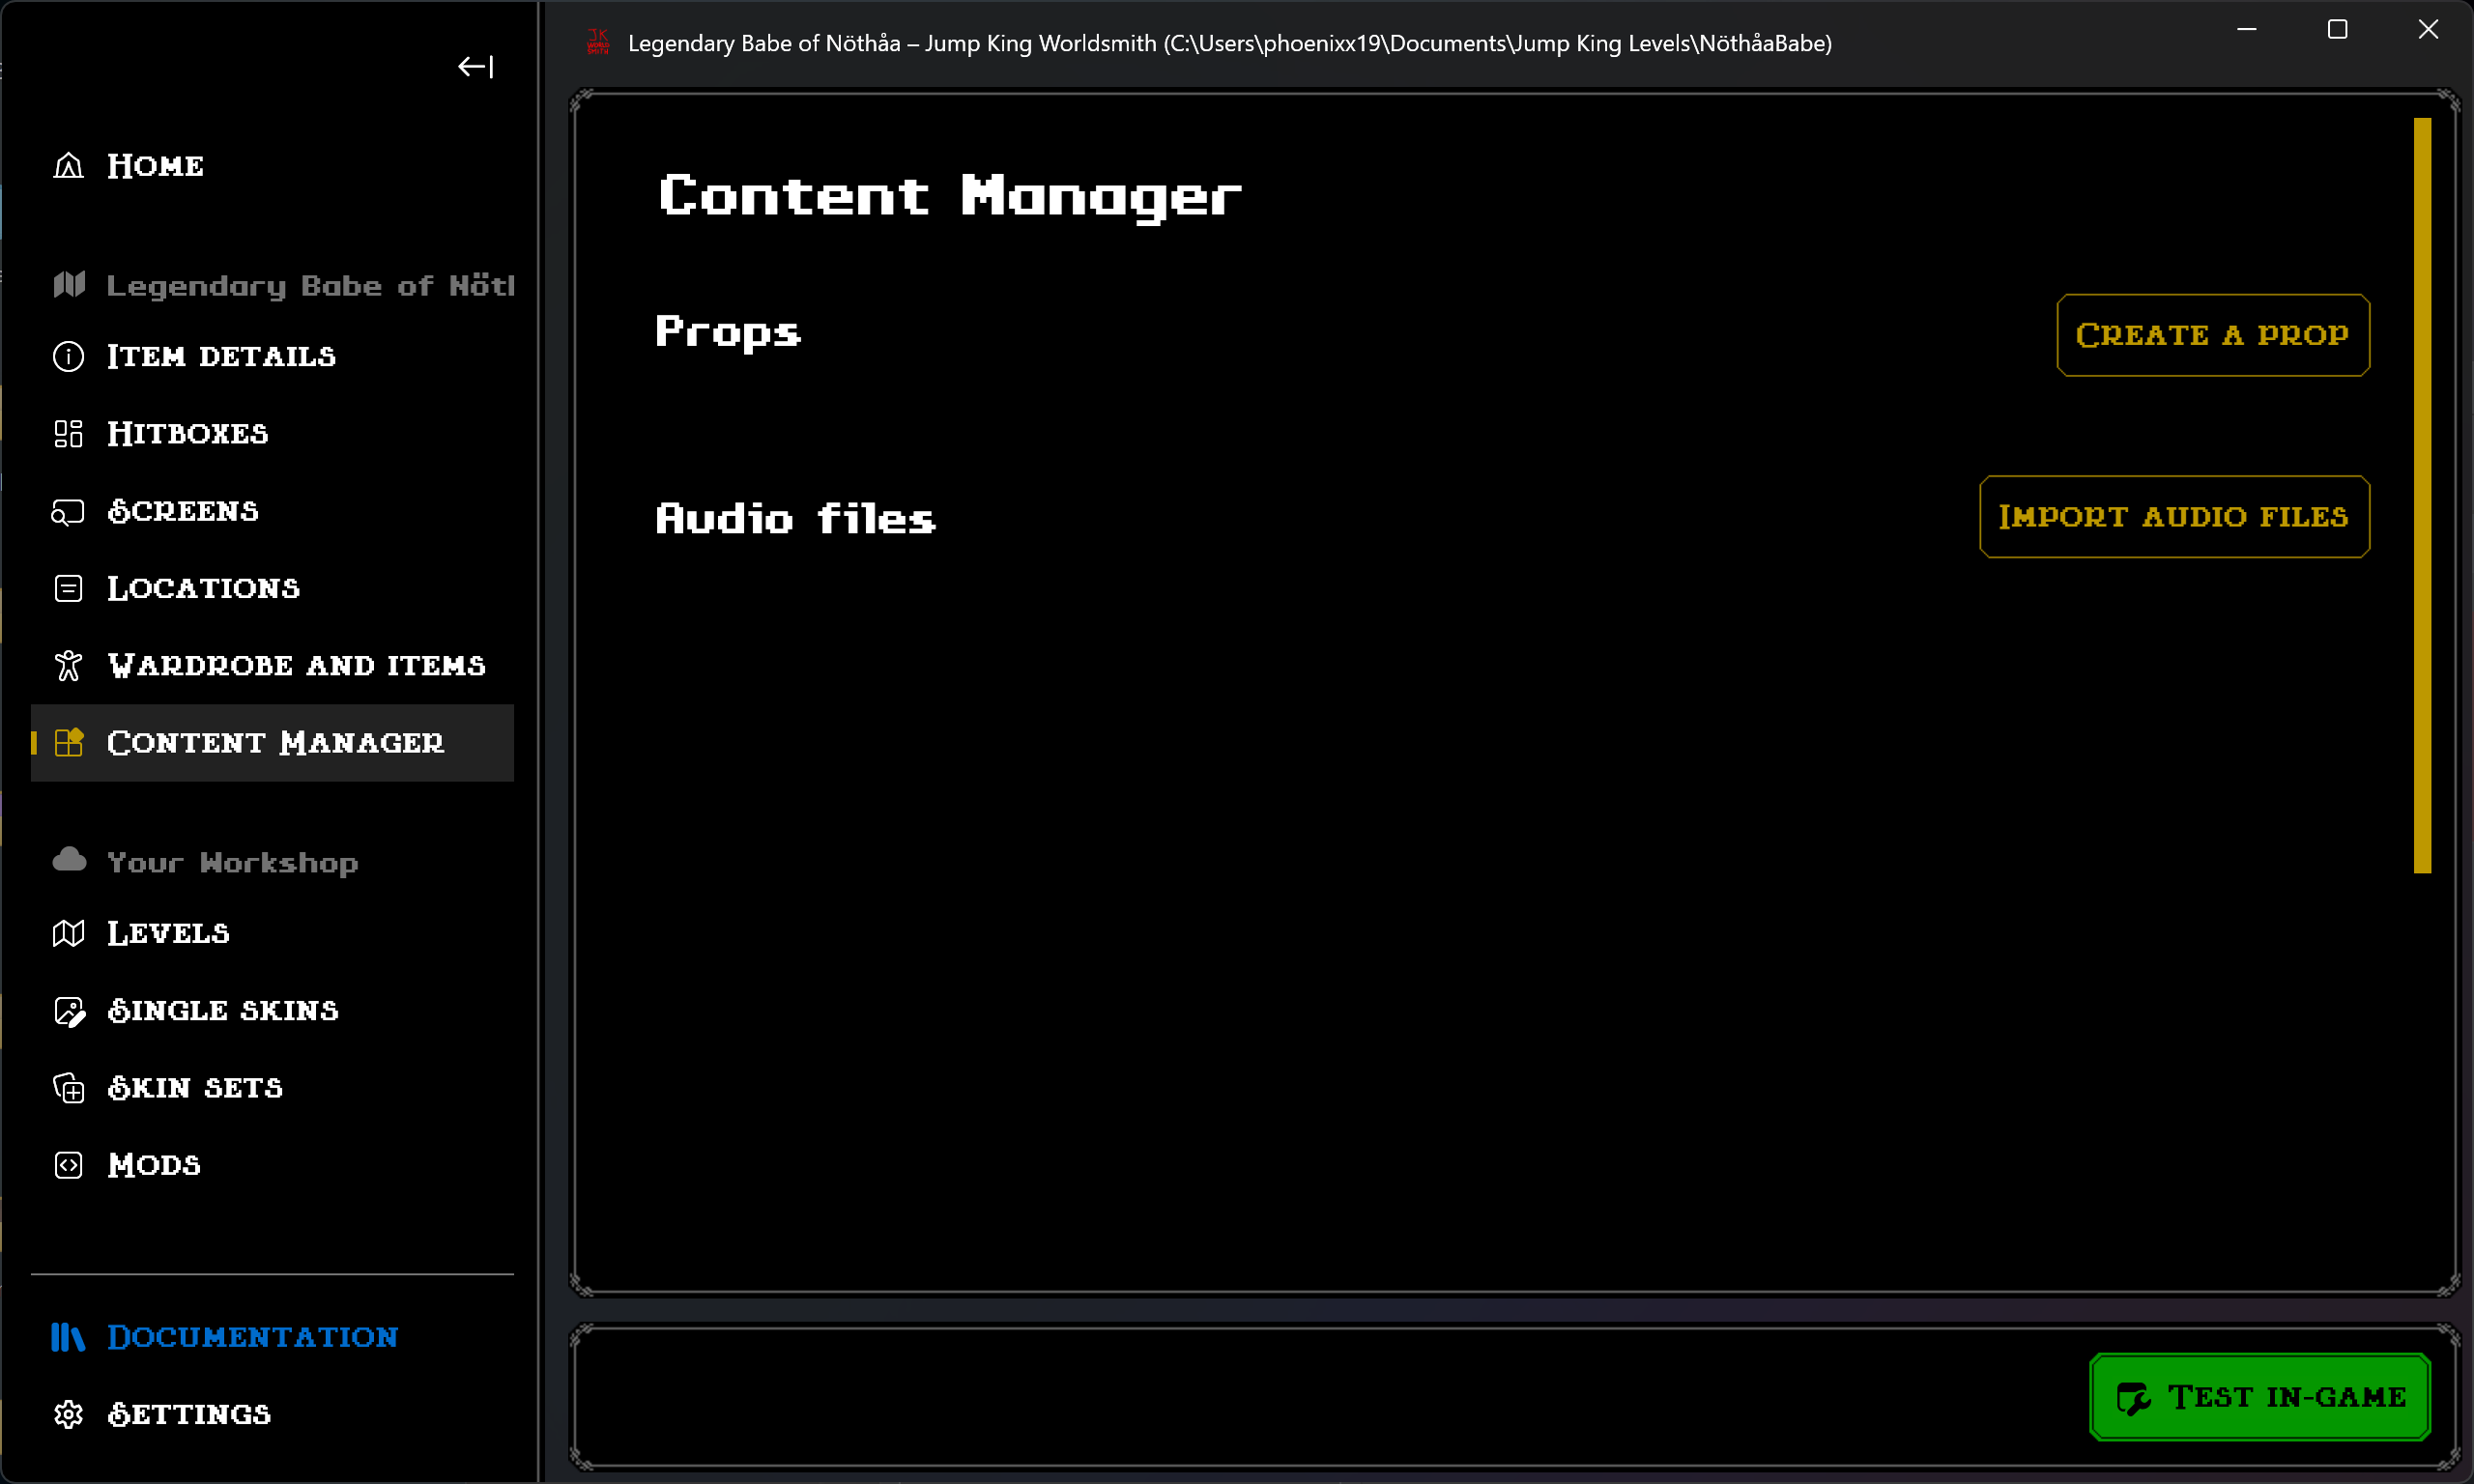
Navigate to the Content Manager page.
Scroll until you find an header “Props”.
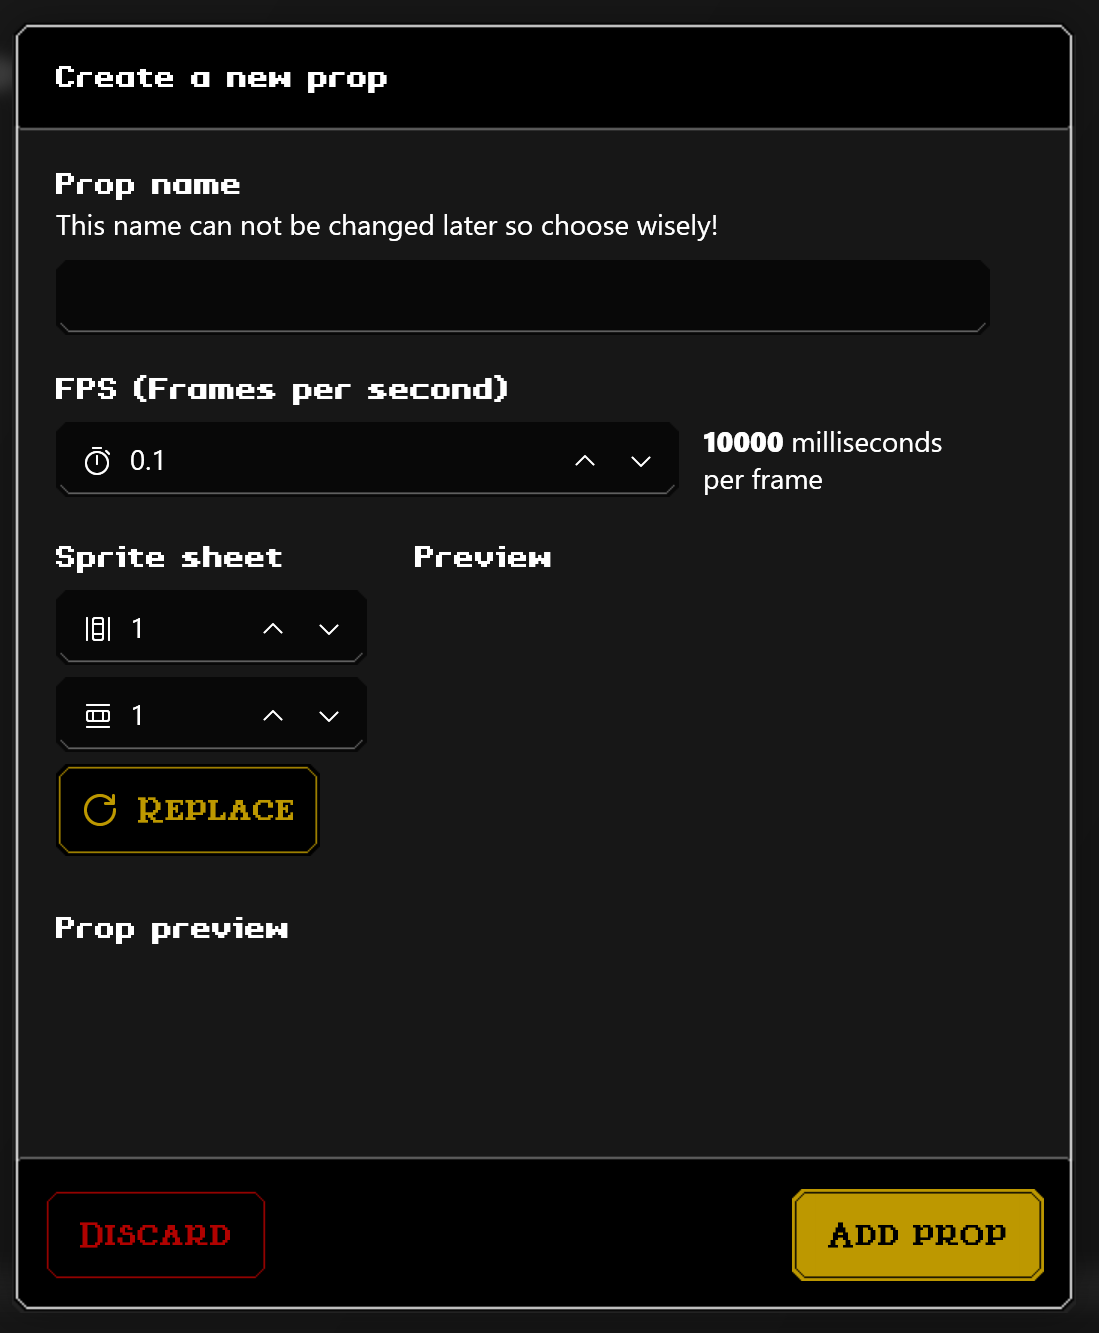
Click on the Create a prop button found on the right side. A prompt will show up asking the necessary information for your prop. The following image is how it should look like:
Write the name for your prop (make it recognizable!).
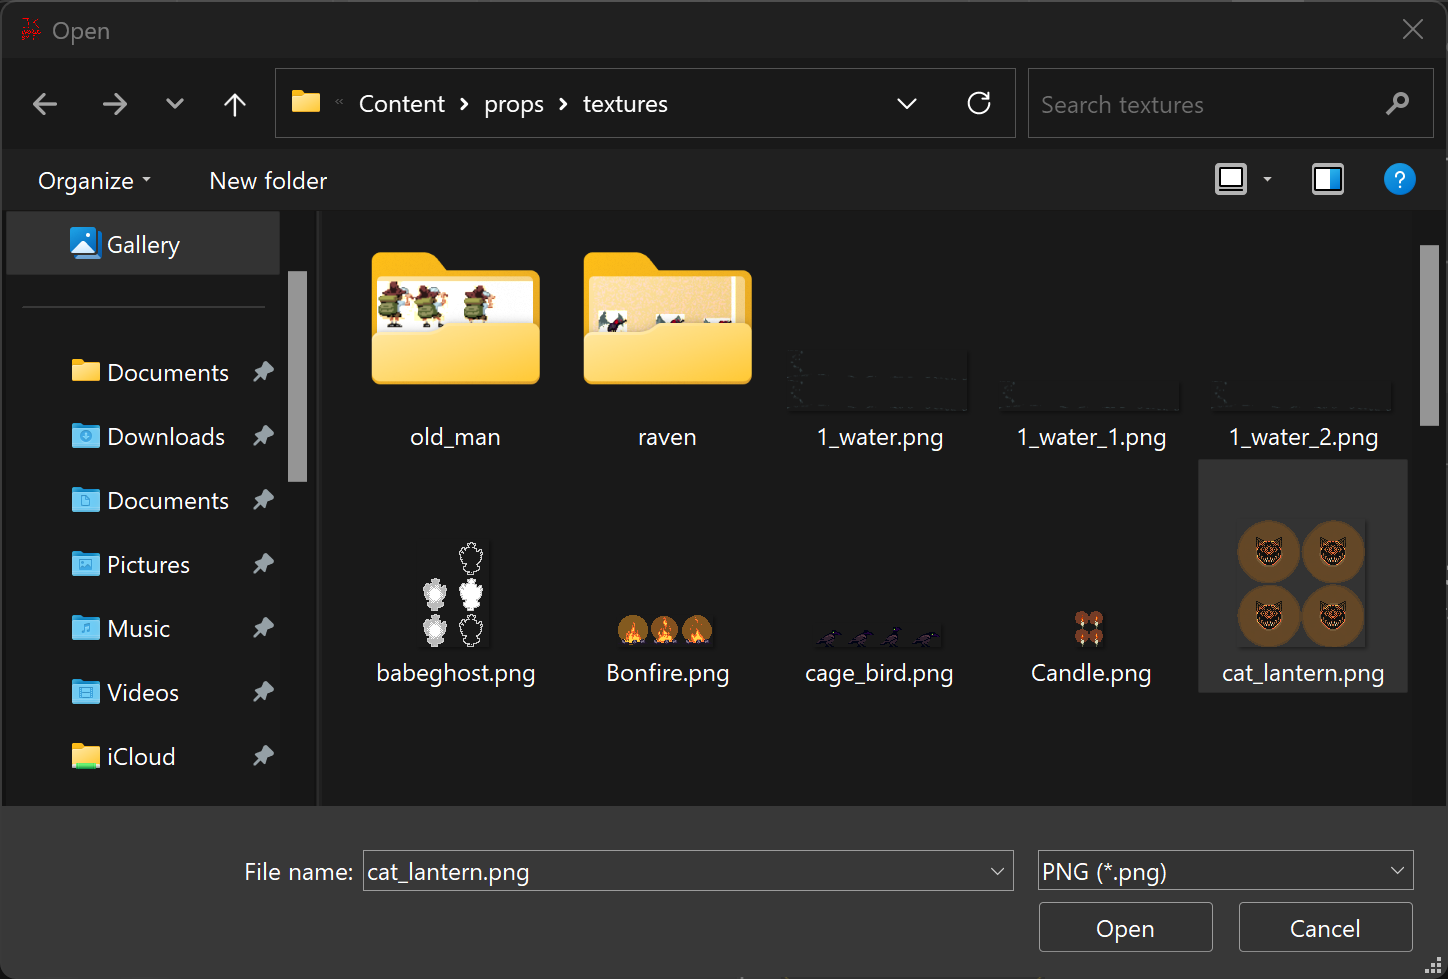
Click on Replace to add (or replace if already added) the texture for your prop.
A new prompt will show up asking to you select the texture of your prop.
After selecting your file, click Open.
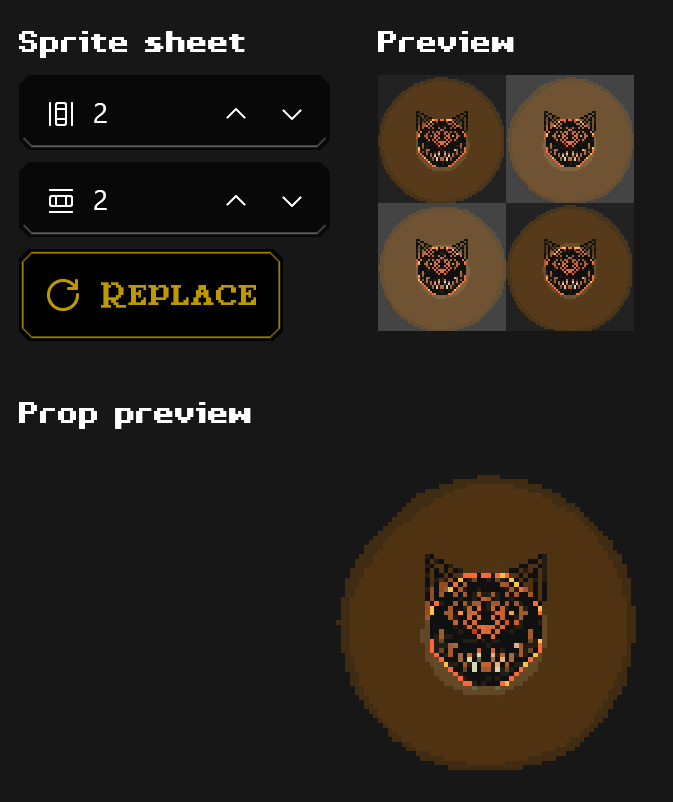
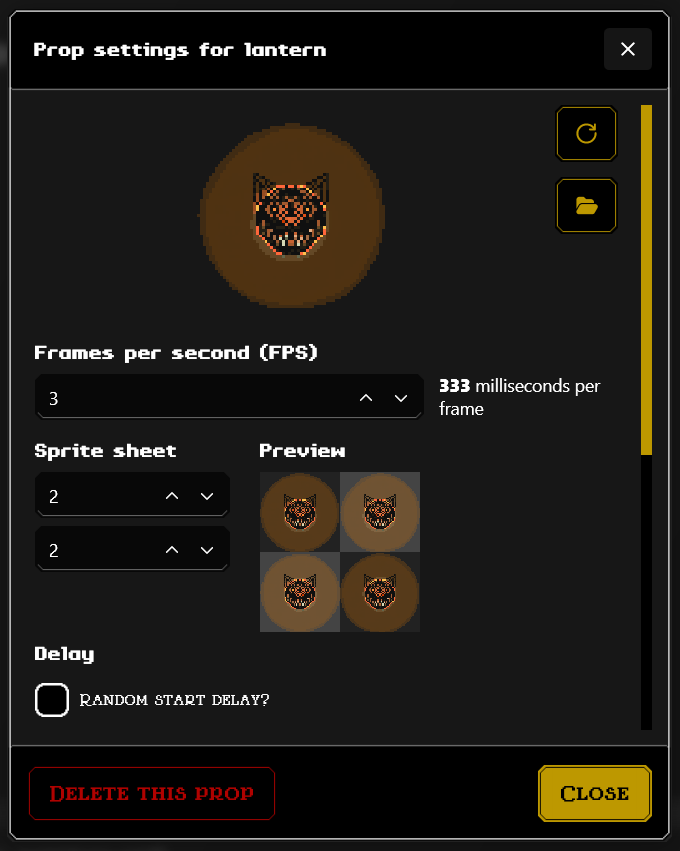
Adjust your sprite sheet by adding rows and columns to make the prop animate properly.
After clicking Add prop, you should see your audio piece below “Props”.
You’ve successfully added a prop in the prop list. Now you can add it on your screen following the next subchapter.
Adding a prop to a screen
To add a prop on a screen:
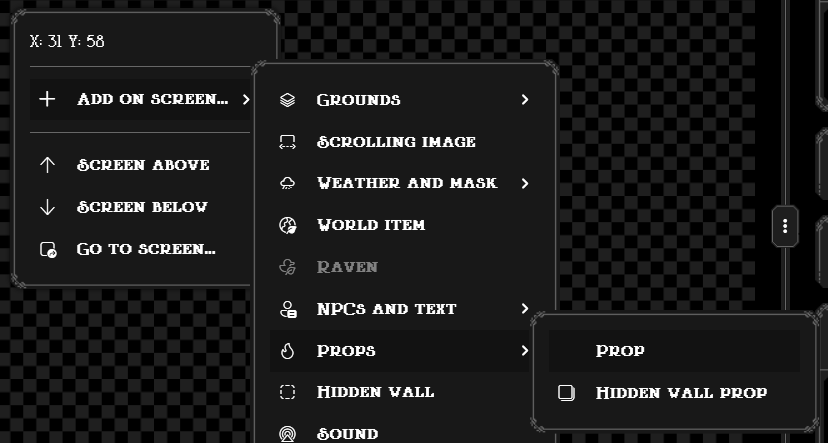
Navigate to the Screens page.
Right-click onto the canvas on the left side of your screen (where you have your level preview) and select Add on screen…, then Props, then Prop.
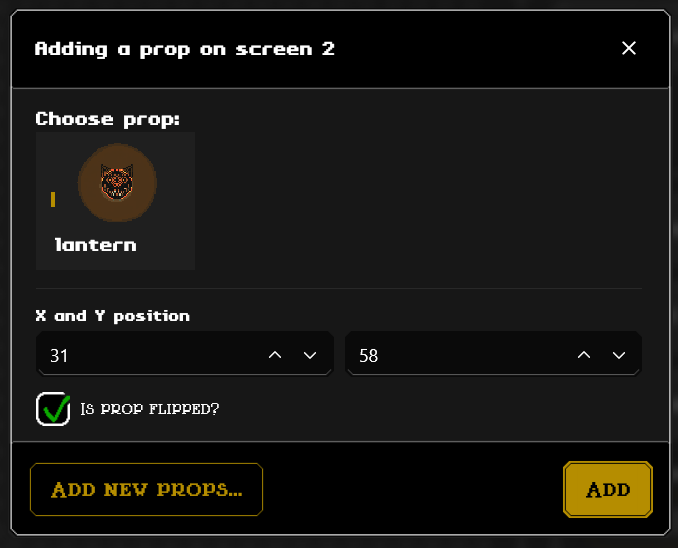
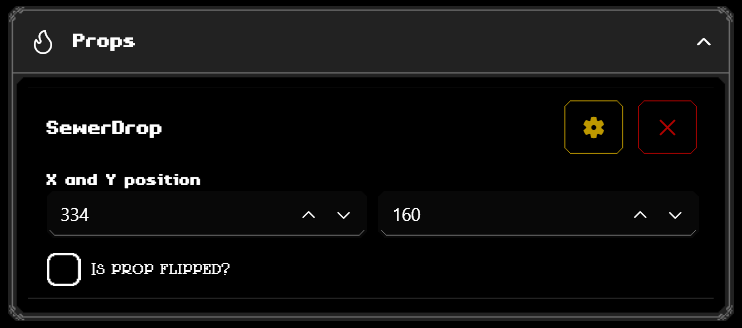
Once clicked, a prompt will ask you a few details. You will need to select which prop you want to add, choose its position and if you want to prop to be horizontally flipped.
Once done setting it up, click Add. Your prop should appear on your preview.
Changing/removing a prop from a screen
Navigate to the Screens page.
Using the Go to screen… button or the up-down arrows, move to the screen you have the background you want to change/get rid of.
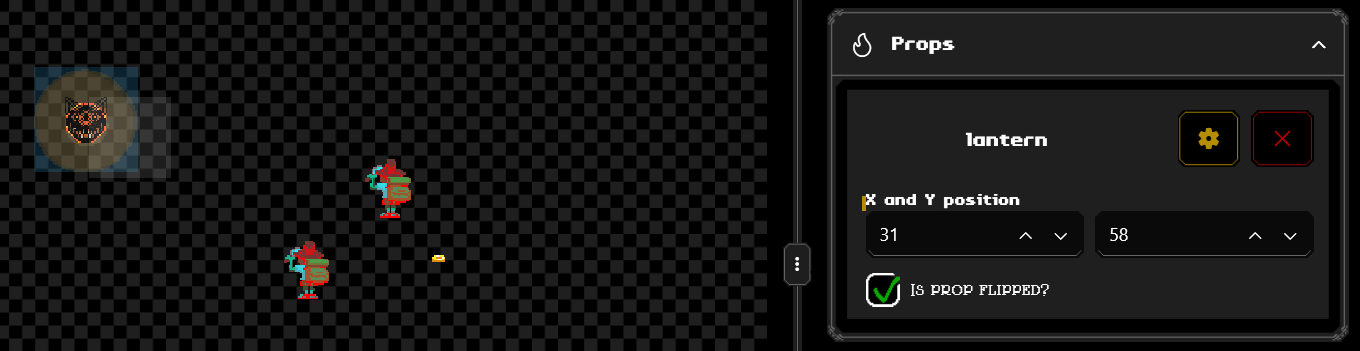
From the right side of the page, expand the Props tab.
Click on a prop or, using the left side of the page (preview), click on the prop’s animated sprite to easily find the prop you are looking for!
Modify the prop’s position using the input boxes, or flip the prop’s texture. Click the yellow button with the cog to head over in the Content Manager page and edit your prop settings accordingly. Click on the red button with the X to remove the prop instance from the current screen.
Changing or removing a simple prop
Navigate to the Content Manager page.
Scroll until you find an header “Props”.
Click on the prop you are looking to modify. The following pop-up will show up:
Change the details at will. If you’d like to delete the prop, click Delete this prop on the bottom-left corner of the pop-up.
This will delete every instance of this prop used in the various screens!
Steps (without Worldsmith)
Adding a simple prop
For starters, you should try having a single sprite sheet (just an image).
Write down your image’s sprite sheet size and its name.
Convert the sprite sheet image of your choice into a packed XNB file.
Place it inside props/textures.
In the same folder you should find a xml file called prop_settings.xml, open it.
Replace YOUR_PROP_FILENAME with the file name of your prop.
Replace YOUR_PROP_FRAMES_PER_SECOND to how many frames you want to see per second. If it’s your first prop, set it to 10, later on you can always change it.
Replace YOUR_PROP_SHEET_COLUMNS_NUMBER and YOUR_PROP_SHEET_ROWS_NUMBER with the sprite sheet size you wrote down; if it’s your first time change both to 1.
If you want to change the duration of your frames, you should copy the example below and customize it to your preference. You can add and remove as many float as you wish. Mind that adding floats will negate the fps value of the prop itself. It’s also recommended to have the same number of floats as your spritesheet so that each frame uses their relative float. (If you have a spritesheet made by 3 columns and 3 rows (9 frames) and you have 8 floats, the 9th frame will read the first float, therefore creating a misalignment on the frames)
<frames><float>3.8</float></frames>
If you want to start with a random frame, simply add right before the closing PropSettings tag:
<random_offset>true</random_offset>
Good, you’ve added a prop so the game can understand its various data. Now let’s add it on a screen.
Navigate to props and check if a prop[SCREEN].xml file exists. (e.g., 65th screen = prop65.xml)
If the file doesn’t exist, create it and paste the following snippet:
Replace YOUR_PROP_NAME with the filename of your prop.
Replace YOUR_PROP_X_POSITION and YOUR_PROP_Y_POSITION to the relative position of your prop.
Replacing a simple prop
If you want to keep the same prop but change its texture:
Convert your new file into a packed XNB file.
Place it in props/textures and replace the item keeping the same name.
If you have changed the sprite sheet, you will need to modify the sprite sheet sizes in the prop_settings.xml file inside the same folder of your packed prop.
If you want to replace a prop in a specific screen with another:
Write down which screen you’d like to replace the prop.
Navigate to the props folder and open the prop[SCREEN].xml file with [SCREEN] as your screen number (e.g., 65th screen = prop65.xml).
Find the prop you want to replace by searching its name, change the type value to your new prop.
Removing a simple prop
To remove a prop:
Write down every screen that prop is used from.
Navigate to the props folder and open the prop[SCREEN].xml file with [SCREEN] as your first screen number (e.g., 65th screen = prop65.xml).
Find your prop you want to remove by searching its name.
Remove the whole PropData tag containing the type that equals the name of your prop.
Repeat Step 2 for each screen that the prop is used from.
Once completed, navigate to props/textures and open prop_settings.xml.
Find your prop you want to remove by searching its name again.
Remove the whole PropSettings tag containing the name that equals the name of your prop.
Remove the prop packed XNB file from the same folder.
Disclaimer for animated props
The sprite sheet in-game will assign them with an index starting from 0. The index order is row by row, from top to bottom.