First of, open the software of your choice and set two layers.
The first (or top) layer should be the layer you use for drawing your skin,
the second (or bottom) layer should be the base file; this second layer will help you building a fully working skin.
A simple trick while making a skin is setting the second (or bottom) layer to a lower opacity, for example 50%.
Additional details (without Worldsmith)
Once satisfied with the texture(s)
Disable or hide the last (bottom) layer.
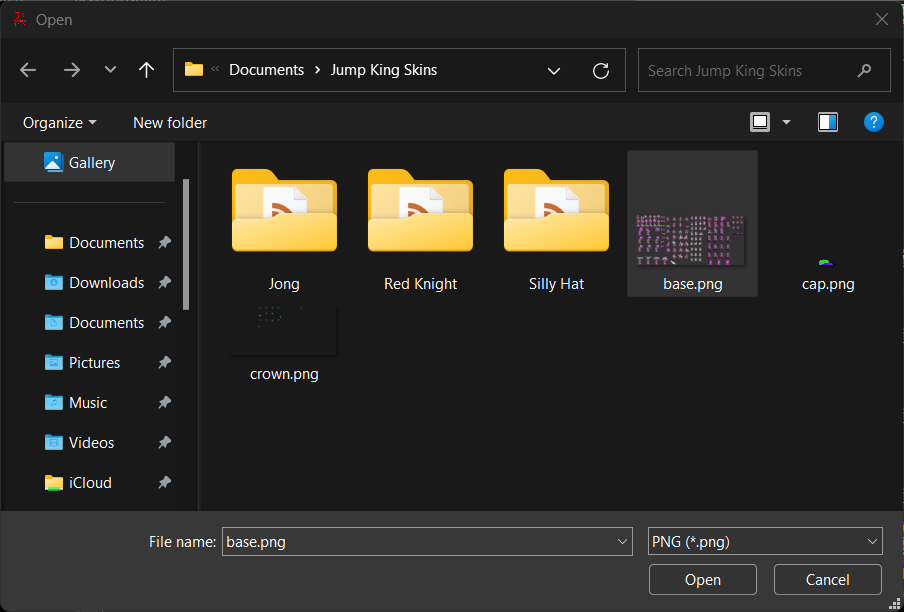
If you are doing a single skin, export the image file but save the filename somewhere since you will need it later.
Otherwise, if you are doing a skin set save them with the following format and save the filenames somewhere since you will need them later.
(YOUR COLLECTION NAME)_(YOUR ITEM NAME).png
This format is not mandatory but can help you identify the items inside your set, in case you need to update something.
Why does Jump King need a configuration file?
In order for get the basic data about your skin or set, Jump King (and in the past with JumpKingPlus) uses a configuration file.
This configuration file contains your skin or set:
the boolean that tells you if the skin/set is enabled
one (if a skin) or multiple (if a set) filenames of your packed images
one (if a skin) or multiple (if a set) item you want to override
Single skins
Changing/replacing a skin
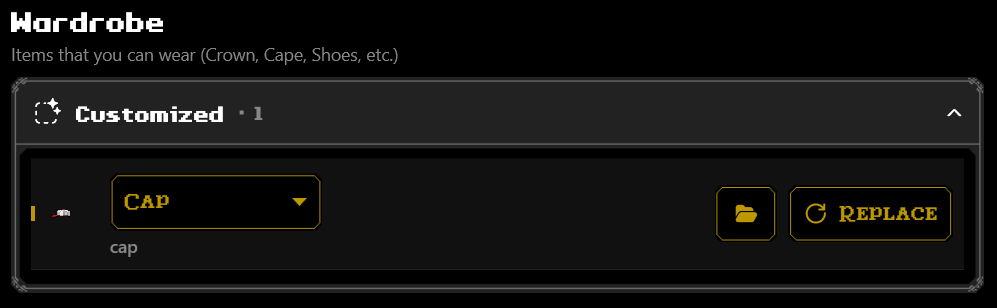
Navigate to the Wardrobe page.
Scroll until you find an header “Wardrobe”.
You should find one item inside the Customized tab, which represents your single skin.
From here you can change its type using the dropdown. Hovering your item will show additional settings such as: a Replace button to replace your item’s texture and a button with a folder icon if you were to open that skin with your file explorer.
Steps (without Worldsmith)
The configuration in sigle skins is called cosmetic_settings.xml. Open the file and proceed with the settings below. A single skin’s configuration file looks like this:
Search for “skin” in your XML file. You should find something like this:
<skin>YOUR_SKIN_HERE</skin>
Replace YOUR_SKIN_HERE with the wearable item of your choice.
Done!
Setting the skin’s filename
Search for “name” in your XML file. You should find something like this:
<name>YOUR_NAME_HERE</name>
Replace YOUR_NAME_HERE with the packed file name of your skin (no extension in the name).
Done!
Skin sets
Adding a skin to a skin set
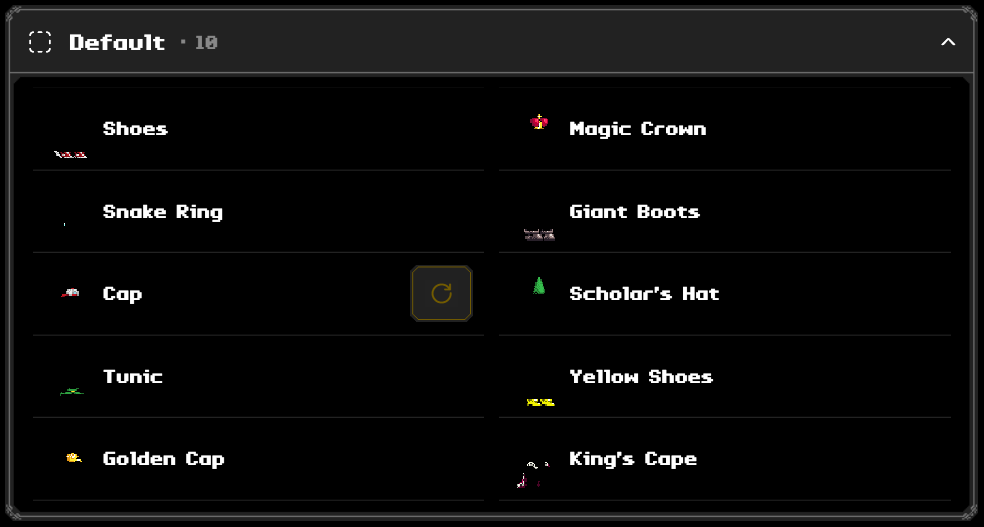
Navigate to the Wardrobe page.
Scroll until you find an header “Wardrobe”.
You should find a Default tab, expanding it will show you the items you haven’t customized.
Hovering an item in the Default tab, will display a Replace button.
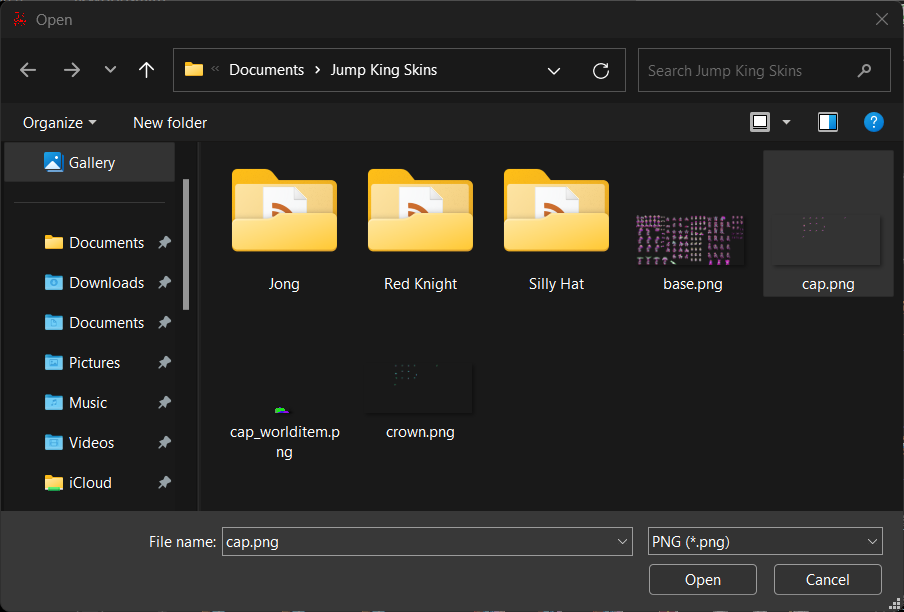
By clicking it, a prompt will show up asking you to select a texture for the skin you’ve clicked the Replace button on.
After clicking Open, your newly modified skin will be displayed inside the Customized tab.
Replacing a skin from a skin set
Navigate to the Wardrobe page.
Scroll until you find an header “Wardrobe”.
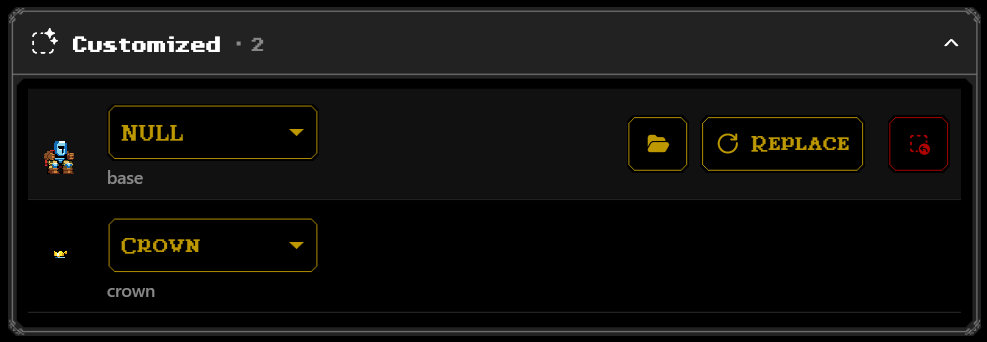
You should find a Customized tab, expanding it will show you the items you have customized already.
Hovering an item in the Customized tab, will display a series of buttons including a Replace button.
By clicking it, a prompt will show up asking you to select a texture for the skin you’ve clicked the Replace button on.
After clicking Open, your updated skin will be displayed.
Deleting a skin from a skin set
Navigate to the Wardrobe page.
Scroll until you find an header “Wardrobe”.
You should find a Customized tab, expanding it will show you the items you have customized already.
Hovering an item in the Customized tab, will display a series of buttons including a red button that has a tooltip that says “Bring back the default look”.
Clicking that button will remove the customized skin from your skin set.
Steps (without Worldsmith)
The configuration in skin sets is called set_settings.xml. Open the file and proceed with the settings below. A skin set’s configuration file looks like this: